Minecraft for Teaching Geography: A Classroom Guide
How to use the free, open-source Arnis to turn real places into Minecraft worlds your students can walk through.
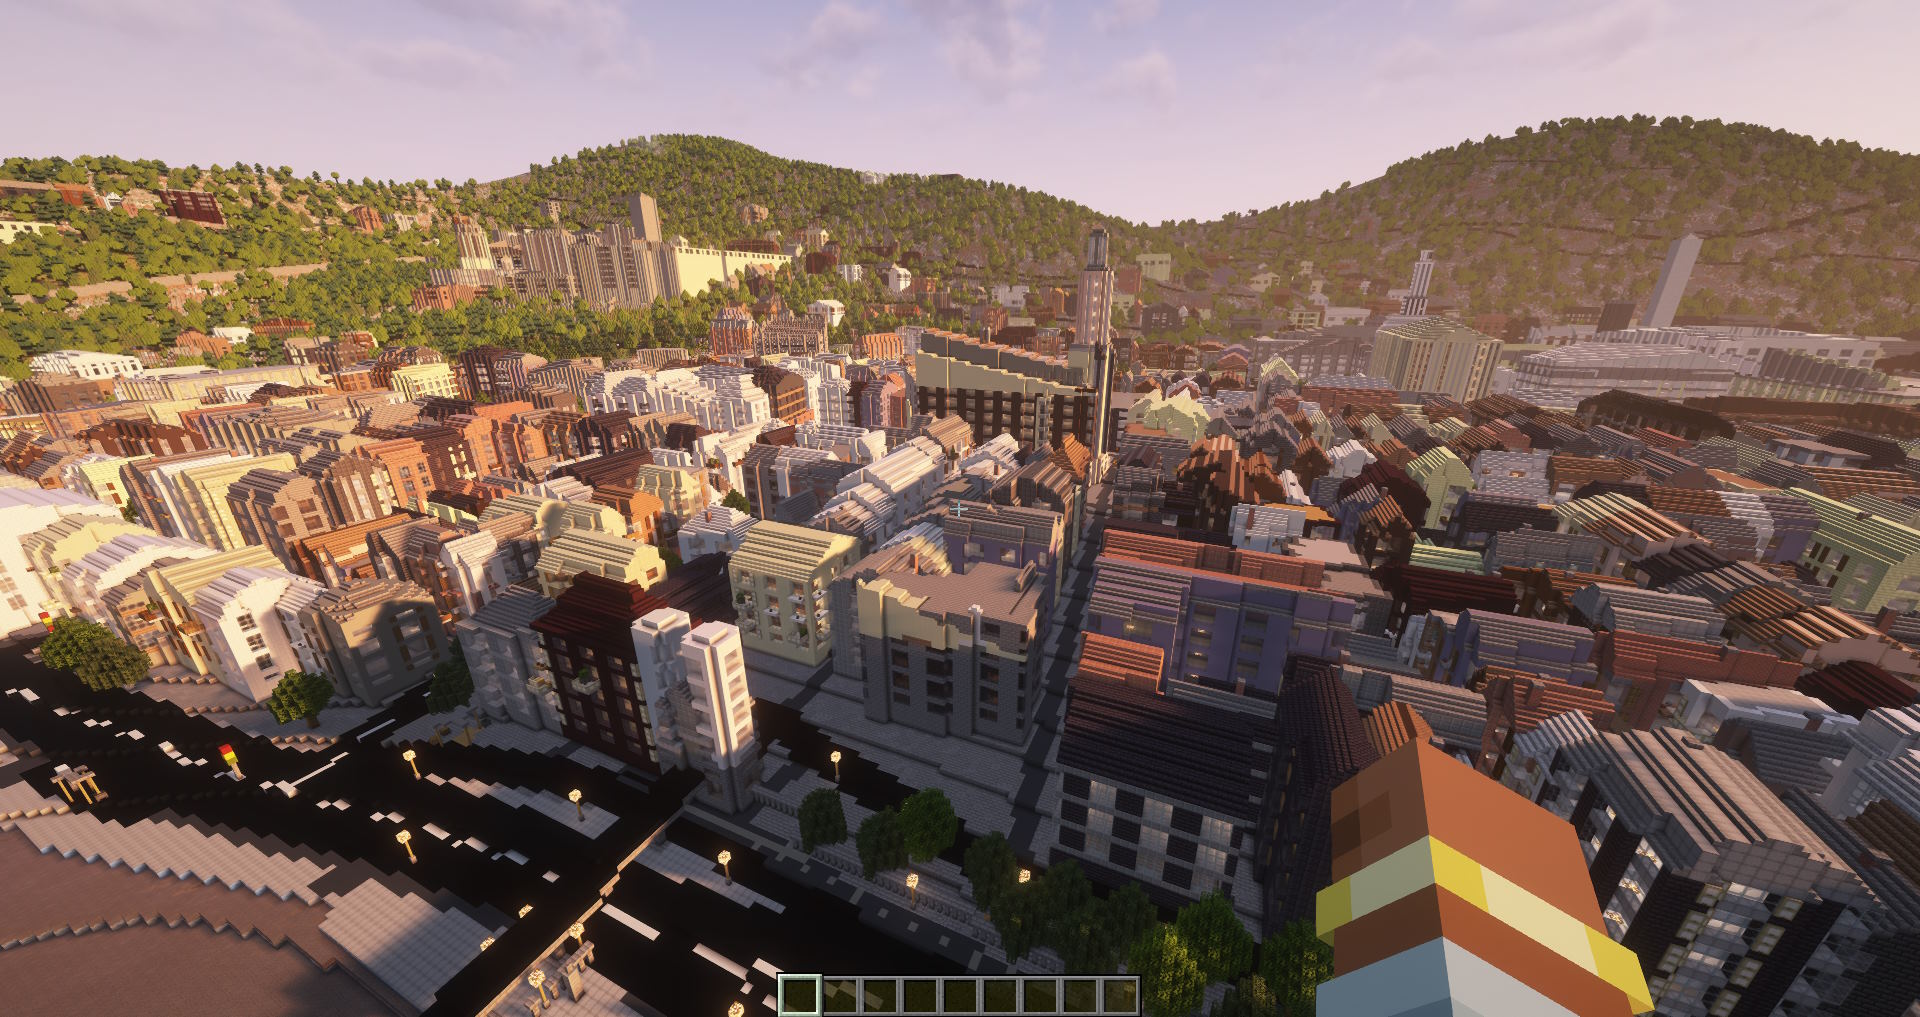
Minecraft is already on most students' minds, and that familiarity is useful in a geography lesson. The trick is connecting it to real places and real concepts instead of a generic random world. Arnis does that. It is a free, open-source tool that reads real map data from OpenStreetMap, adds elevation data, and builds an actual Minecraft world out of it: buildings with real footprints, roads, rivers, coastlines, parks, and terrain.
The single most effective thing you can do is generate the town your students live in. A famous skyline is impressive, but the street they walk to school on is the one they will recognize block by block. That recognition is where the learning starts. This guide focuses on the free desktop app, which runs on standard school computers and needs no accounts.
Why your own town beats a generic map
Geography skills like map reading, scale, and spatial thinking usually have to be taught in context and practiced repeatedly. A blank textbook map gives students nothing to anchor to. A world they can recognize does.
When you generate the local area, several things happen at once:
- Students immediately spot landmarks: their school, the river, the main road, the supermarket. Engagement is built in because they are checking whether the model got it right.
- The link between a flat map and a three-dimensional place becomes concrete. They have seen the real version, so the abstraction has something to attach to.
- Errors become teaching moments. If a building is missing or a path is in the wrong spot, that is a lesson about how maps are made and who maps them.
- It scales to anywhere. Once students understand the local model, comparing it to a distant city is far more meaningful.
OpenStreetMap is the data source, so coverage depends on how well an area has been mapped. Major cities are usually excellent. Smaller towns still work, though some buildings may be missing if no one has added them yet. That gap is worth showing students directly. It explains a lot about data, contributors, and why some places appear in more detail than others.
Lesson ideas by theme
These are starting points. Most work for a single lesson or stretch across a short unit. Adjust the area size to fit your timetable and the machines you have.
Urban geography and land use. Generate the town center and a residential edge as two worlds, or one larger area that includes both. Have students walk through and classify what they see: housing, retail, industrial, green space, transport. They can mark the boundaries between zones and discuss why shops cluster on a main street while housing spreads out. Pair this with a real land-use map of the same area so they compare their in-game observations against an official classification, and you have a clean introduction to why land gets used the way it does.
Settlement geography: why towns sit where they do. This is one of the strongest uses of a real terrain model. Generate an area with a clear physical reason behind its settlement, such as a town in a river valley, at a bridging point, on a coast, or sheltered by hills. Students walk the terrain and work out the site factors: flat dry ground, fresh water, defensible high ground, a crossing point, access to a harbor or trade route. Standing inside the landscape makes the link between physical geography and human settlement far more obvious than a diagram does.
Rivers, terrain, and topography. Arnis includes elevation data, so hills, valleys, and river courses come through. Pick an area with a river and have students trace it from high ground to low, noting how the settlement sits around it. Why is the old part of town on that side of the river? Why does the road bend there? Standing in the valley in first person makes contour lines on a paper map far easier to read afterward.
Natural hazards and flooding. Flooding is one of the most teachable hazards because the cause and the defenses are visible. Generate a low-lying area near a river or coast, then use Minecraft's water to model what a flood would reach and which streets, homes, and routes are affected. Students can then experiment with mitigation: raised ground, barriers, drainage, or moving vulnerable buildings. This mirrors real classroom research. The Floodcraft research paper describes a Minecraft learning environment built to teach K-12 students flood mitigation strategies such as floodwalls, sandbagging, and elevating structures, which shows the approach works as a serious teaching method, not just a novelty.
Your town versus a famous city. Generate your local area and a well-known city like Manhattan, central Paris, or central Tokyo at a similar size. Students compare block patterns, building heights, street width, and how much green space each has. This is a clean way to introduce density, grid versus organic street layouts, and how geography and history shaped each place.
Redesign your area. Once students know a place well in the model, have them improve it. Pick a real spot that could be better, such as a dull square, a car-dominated junction, or an unused patch of ground, and ask groups to redesign it for people: green space, safer crossings, seating, cycling, housing. This is exactly how the UN-Habitat Block by Block program has used Minecraft to let residents redesign real public spaces, so it connects classroom planning to a genuine method used in the field. It works well as a group project with each team presenting and defending its plan.
Map reading versus a 3D world. Give students a paper or screen map of the generated area and a list of features to find inside Minecraft: a bridge, a school, a particular junction. They navigate the world using only the map. This directly practices legend reading, orientation, and translating a top-down symbol into a real structure, which is a skill many students lack if they have only ever used turn-by-turn digital maps.
Fieldwork to Minecraft. If you do any local fieldwork, generate the same area beforehand. Students collect observations outdoors, such as land use, building condition, or traffic, then return to the classroom and locate each point inside the Minecraft version. The game becomes a shared model of the place they just visited, and it is available again whenever you need it, in any weather.
Beyond the geography curriculum
The real-world side of these worlds reaches past standard lesson plans. The Floodcraft work above is one example of using a recognizable place to teach something serious. We have heard from someone who supports special educational needs youth groups that they recreate real journeys and places in Minecraft so anxious young people who find it hard to leave the house can rehearse a trip or a visit in the game before doing it for real. Walking the actual route to a new school, a clinic, or a station in a familiar game first can take some of the fear out of doing it in person. It is a use we did not design for, but it shows how much a faithful model of a real place can matter.
Classroom logistics
The practical side is where Arnis fits a school well:
- It is completely free and open source, licensed under Apache 2.0. There is no per-seat cost and no subscription.
- No accounts or sign-ups. Students do not need an email address or a login to generate or open a world.
- It runs on standard school machines. The desktop app has builds for Windows, macOS, and Linux.
- Generating a world needs internet, because Arnis downloads map data from OpenStreetMap and elevation data while it builds. Playing an already-generated world in Minecraft works fully offline, which is useful for filtered or limited school networks.
- You control the area. You decide exactly which place is generated, so the lesson stays on topic.
A reliable approach for a class is to generate the worlds yourself ahead of time on one machine, then distribute the world files to student computers. That way you are not depending on every machine downloading map data at the same moment, and every student starts from the same place. Java worlds save as a world folder you drop into the saves directory. Bedrock exports a single .mcworld file that imports with a double click or tap.
If your school uses Minecraft Education, the Bedrock .mcworld files Arnis produces import directly into Minecraft Education Edition, so a world you generate can be opened there without conversion. As always, test the import on one device before the lesson so you know the steps.
A note for budget-limited schools: some avoid Minecraft licensing costs by using Luanti (formerly Minetest), a free, open-source voxel game that looks and plays much like Minecraft. It is worth knowing about if licensing is a barrier. Be aware that Arnis builds Minecraft Java and Bedrock worlds only. It targets Minecraft today and does not export to Luanti, so the worlds in this guide are for Minecraft, not Luanti.
Start small the first time. Generate a few blocks rather than a whole city so you can see how the output looks and how long generation takes on your hardware before you commit a lesson to it.
Running Arnis on Chromebooks
Many schools run on Chromebooks, so this needs a clear and honest answer. Arnis ships a Linux build, and modern Chromebooks can run Linux apps through the built-in Linux development environment (Crostini). With one important condition.
The Linux build of Arnis is x86_64 only. There is no ARM build. ChromeOS can only run Linux code that matches the device's processor, and it does not run x86 software on ARM chips without manual emulation that is not practical in a classroom. So the rule is simple:
- x86 (Intel or AMD) Chromebooks with the Linux environment enabled can run the Linux build of Arnis.
- ARM-based Chromebooks cannot run it through the standard Linux environment, because no ARM build exists.
- To check which one you have, open the Crosh terminal and run uname -m. If it reports x86_64, you are on an Intel or AMD device. If it reports aarch64 or arm, you are on an ARM device.
On a supported x86 Chromebook, turn on the Linux development environment in ChromeOS settings, open the Linux terminal, and run the Linux build of Arnis there. If your fleet is ARM-based, the cleaner route is to generate worlds on a Windows, Mac, or Intel Linux machine and then open the resulting Bedrock .mcworld files on the Chromebooks. Always test on one device before rolling a lesson out across a cart of them.
Getting started
To set this up for a class:
- Download the free Arnis app for your operating system from the GitHub releases page.
- Open it and navigate the built-in map to your town, then draw a rectangle around the area you want.
- Choose Java or Bedrock to match the Minecraft edition your students use.
- Generate the world. A few blocks take seconds; a larger area takes a few minutes.
- Copy the world file to student machines, or have students open it on their own device.
If installing software on school machines is a problem, there is a no-install option. MapSmith is the official online version that generates worlds in the browser, so nothing needs to be installed locally. It is a paid service, while the desktop Arnis app is free, so for most classroom budgets the free desktop tool is the place to start.
If you want a full walkthrough of how the generator works, including what map features come through and how to import worlds, see the Minecraft world generator guide.
Frequently asked questions
Is Arnis free for schools?
Yes. Arnis is free and open source under the Apache 2.0 license. There is no per-student cost and no subscription. The optional online version, MapSmith, is a paid service, but the desktop app is free.
Does it need an internet connection or student accounts?
Generating a world downloads map data, so the generation step needs internet. Once worlds are generated, opening and exploring them in Minecraft works offline. Arnis itself needs no accounts or sign-ups.
Can it run on school Chromebooks?
Only on x86 (Intel or AMD) Chromebooks with the Linux development environment enabled, because the Linux build of Arnis is x86_64 only. ARM Chromebooks cannot run it directly. On those, generate worlds on another machine and open the Bedrock .mcworld files on the Chromebooks.
Where does the map data come from?
Arnis reads real map data from OpenStreetMap and combines it with elevation data. The detail of a generated area depends on how well that place has been mapped by OpenStreetMap contributors.
Which Minecraft edition should I use in class?
Use whichever your students already have. Arnis builds both Java Edition worlds (a save folder) and Bedrock Edition worlds (a single .mcworld file). Bedrock is often easier to distribute because it is one file per world, and Bedrock .mcworld files import directly into Minecraft Education Edition.
Bring real geography into your classroom
Download the free, open-source Arnis and turn your own town into a Minecraft world for your next lesson.
Download Arnis (free) See how the generator works